

Drone surveying uses aerial images to document a roof, building facade or site before a team relies on measurements for planning. A useful result is not defined by a fixed number of photos. It depends on the purpose of the survey, the site geometry, image quality, coverage and the checks completed before the model is used.
This guide explains a practical drone surveying workflow: define the decision you need to make, plan the capture, collect a usable image set, review the 3D model and use the resulting information in the right workflow.
What is a drone surveying workflow?
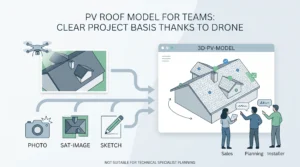
A drone surveying workflow turns a planned aerial capture into information that can be reviewed for a specific project decision. Depending on the project, that may mean understanding roof geometry, documenting a building envelope, reviewing access constraints or building a clearer view of terrain and site features.
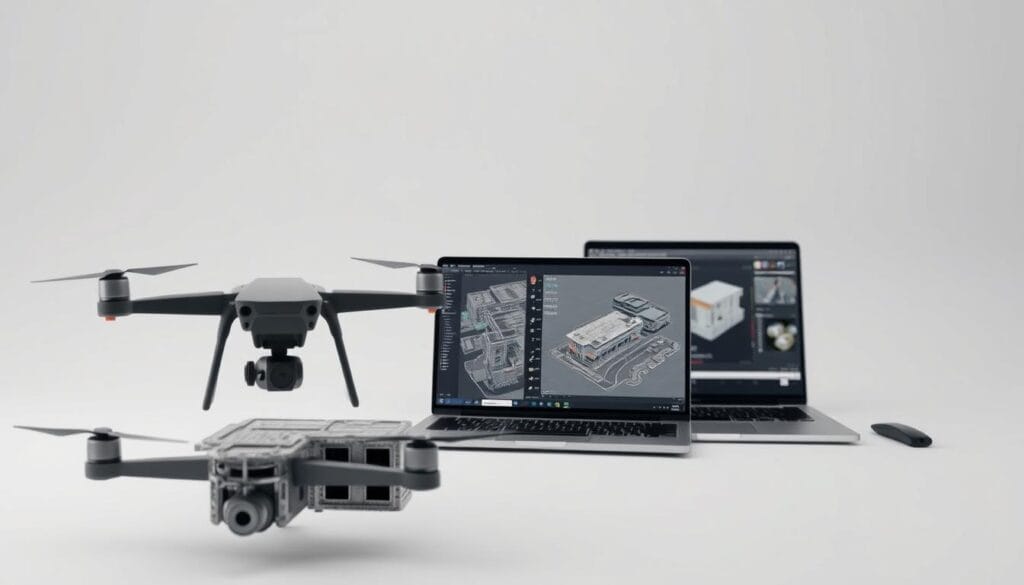
For a reliable workflow, treat drone data collection as more than a flight. The quality of the final 3D model is shaped by the brief, the capture plan, the original image files and the quality checks that happen before measurements are used.
1. Define what the survey needs to support
Start with the decision the survey needs to support. The same drone technology can be used for different purposes, but a roof measurement, a facade survey and a land survey do not require the same views of a site.
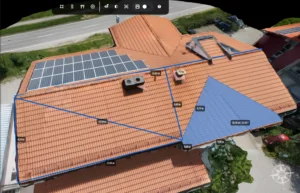
- Roof projects: plan for the visible roof surfaces, edges, obstructions and areas that need review. For a solar-specific workflow, see drone roof survey and measurement.
- Facade projects: plan views that document the relevant building elevations, openings and hard-to-reach areas. See the facade survey and measurement solution.
- Land and site projects: plan for terrain changes, access routes, structures, vegetation and the wider site boundary. See land surveying and terrain modelling.
Write down the questions that the model must answer before flying. This helps the pilot and project team decide which areas need coverage, which surfaces may be difficult to capture and what must be checked afterwards.
2. Plan the flight before collecting drone data
Good aerial surveying begins on the ground. Review the site for access limits, obstacles, changing elevation, reflective or featureless surfaces, vegetation, weather and local operating requirements. If a location cannot be seen clearly from the planned flight path, it may not be represented clearly in the final model.
Use a flight plan that gives the project team a consistent approach to coverage. The exact route, altitude, camera angle and image density should be chosen for the site and the intended output rather than copied from a generic photo-count rule.
Before flying, confirm that the team can safely operate at the site and that the planned capture respects applicable local rules, permissions and airspace requirements. A 3D model supports site understanding; it does not replace safe operating procedures or professional judgement.
3. Capture a usable image set
Drone mapping works best when the image set is consistent, complete and easy to review. Keep the original photos, because edited, compressed or exported copies can lose useful metadata and reduce the ability to diagnose a capture problem later.
During the flight, check for:
- Coverage of the surfaces and areas identified in the project brief
- Clear images without obvious motion blur or missed sections
- A range of useful viewing angles where the site geometry requires it
- Consistent focus and exposure where conditions allow
- Original image files and available location metadata retained for review
There is no universal number of photos that guarantees a usable model. A small, simple roof and a complex multi-level site have different capture requirements. If the images do not show a surface clearly, more processing cannot reliably recreate information that was never captured.
You can use the Drone Flight Route Viewer to review photo locations and route geometry before ordering a model. It is a metadata and capture-review tool, not a guarantee that a final 3D reconstruction will be accurate or complete.
4. Prepare the project for 3D model creation
Organise the original drone images so that the project can be reviewed as one complete capture. Avoid mixing unrelated flights, duplicate exports or heavily edited image files into the same upload unless the workflow specifically requires them.
Before uploading, review the project name, capture date and the intended use of the model. Follow the current Render-a upload requirements for supported files and project setup. If a project includes complex geometry, dense vegetation, reflective materials or areas hidden from view, flag those limitations for the person reviewing the model.
5. Review the 3D model before using measurements
A 3D model should be reviewed before it is used for a proposal, layout, quantity estimate or project decision. Look for coverage gaps, distorted geometry, blurred areas, occluded surfaces and locations where the site conditions make interpretation uncertain.
Use this review checklist:
- Are the required roof, facade or terrain areas visible and complete enough for the intended decision?
- Are edges, obstacles, openings and other important features represented clearly?
- Do known site dimensions or reference points broadly agree with the model where verification is possible?
- Are shadows, vegetation, reflective surfaces, narrow gaps or inaccessible areas affecting the result?
- Does the model contain enough information for the next step, or does the team need another site check?
For engineering, contractual, regulatory or safety-critical work, confirm critical measurements through the appropriate qualified professional and project-specific verification process. Drone surveying can reduce uncertainty, but it should not be presented as a substitute for every on-site check.
6. Use the model in the right project workflow
Once the model has passed the relevant review, it can help teams make earlier and better-informed decisions from a shared view of the site.
- Roof measurement and solar planning: review roof areas, slopes and visible obstacles before progressing with the design workflow. Explore drone roof measurement for solar projects.
- Facade measurement: document a building envelope and identify areas that need closer verification. Explore drone facade survey and measurement.
- Land and site planning: review terrain, access, elevation changes and visible site features for development or infrastructure workflows. Explore drone land surveying and terrain modelling.
Render-a brings these workflows together around a measurable 3D project view. To see the broader platform and the available solution areas, visit Render-a 3D modeling solutions.
Common drone surveying questions
How many photos are needed for a drone survey?
The right number depends on the size and geometry of the site, the camera, the flight plan, the level of detail required and the areas that must be visible. Plan coverage around the project decision instead of relying on a fixed photo count.
Can drone mapping replace every site visit?
Drone mapping can help teams review many site conditions remotely and prepare for fieldwork more effectively. It does not remove the need for project-specific verification, qualified review or site checks where they are required.
What can affect the quality of a 3D model?
Image sharpness, coverage, lighting, weather, camera position, complex geometry, vegetation, reflective materials and areas hidden from view can all affect the result. Reviewing the capture and the completed model is an essential part of the workflow.
Can drone surveying be used outside solar projects?
Yes. The same aerial data collection approach can support building-envelope review, facade measurement, land and terrain assessment, construction planning and other site-based workflows. The capture plan and review process should be adapted to the project purpose.
Start with a clearer view of the site
A disciplined drone surveying workflow helps project teams move from aerial images to a reviewable 3D project view. Start with the decision you need to make, capture the right information, check the model carefully and use it in the workflow where it adds value.
Explore Render-a and start a demo project.