

Most solar projects do not become difficult when someone opens a design tool. They become difficult earlier, when the team is still trying to understand the roof.
Aerial photos, satellite views and handwritten notes can all help with an initial conversation. But on a roof with multiple planes, dormers, chimneys, parapets or nearby trees, they rarely give sales, project and design teams the same picture of the site. That is where assumptions begin to creep into an estimate or an early layout discussion.
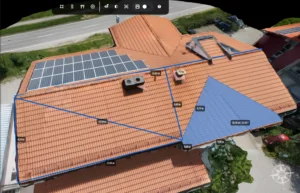
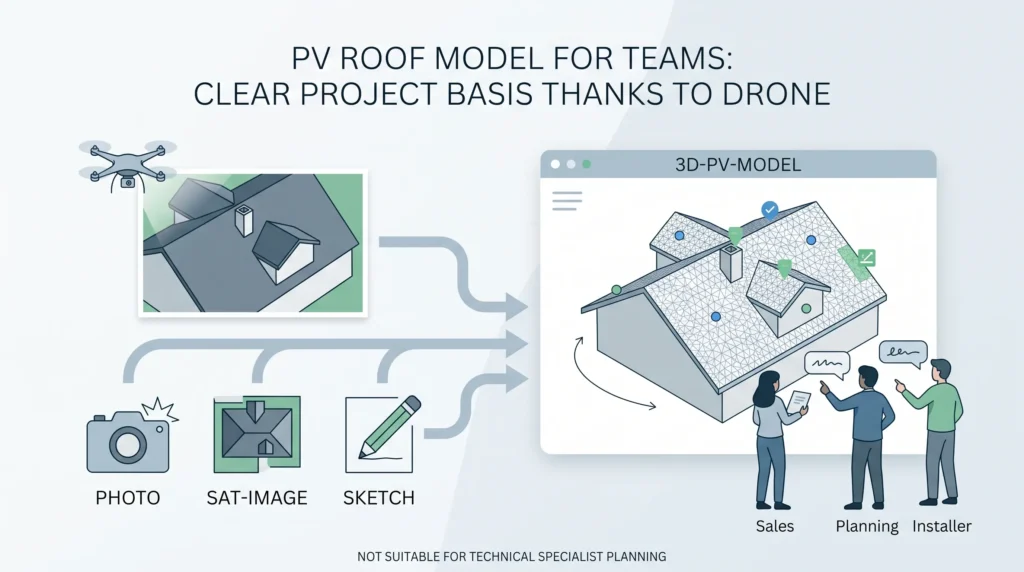
A 3D roof model built from drone imagery gives the team a shared view of the property before detailed planning begins. It does not replace professional engineering. It gives that work a clearer starting point.
Why a roof photo is not always enough for a solar proposal
One photograph can show a roof. It cannot always show how each roof plane, obstruction and surrounding feature relates to the others.
Before preparing an early solar proposal, a team may need to discuss questions such as:
- Which roof surfaces should be considered together?
- Where are chimneys, roof windows, dormers or technical equipment located?
- Which areas need another check before a preliminary module layout can be discussed?
- What still needs to be confirmed with the customer, the installation team or the responsible designer?
These are not just design questions. They also affect how confidently a team can discuss the project with a customer and how many unknowns remain between the first conversation and detailed planning.
What a 3D roof model adds to the conversation
When suitable drone imagery is turned into a 3D roof model, the images, roof geometry and visible site features can be reviewed in one shared context. For solar installers and EPCs, that makes it easier to discuss the roof before decisions become expensive to revisit.
The model is not a finished solar design. It is a practical project input that can help teams to:
- Review the roof and visible site conditions together.
- Record open questions around roof areas, obstructions and access.
- Prepare a first proposal or layout discussion with a clearer visual reference.
- Hand relevant project context to the people responsible for detailed design.
The data needed for a project depends on the imagery, capture method and intended use. Teams should confirm that the available model and measurements are appropriate for the project before relying on them.
From drone imagery to a solar project starting point
The workflow does not start with yield simulation or electrical design. It starts with the building.
1. Capture the roof with the next decision in mind
For a useful model, the image set needs to cover the roof surfaces and site features that matter for the next stage of the project. Before a flight, it is worth agreeing on what the team needs to see for an estimate, a first layout conversation or later technical work.
2. Create and review the 3D roof model
A drone roof survey for solar can turn captured imagery into a measurable, shared 3D project view. The team should then review whether the roof areas and visible obstructions relevant to the project are represented clearly.
That review matters. A 3D model is not a project approval. Hidden details, unclear roof conditions and project requirements still need to be recorded and checked by the appropriate people.
3. Prepare the proposal and early layout discussion
When sales, project development and design are looking at the same model, assumptions are easier to surface early. The team can discuss which areas are being considered, where visible obstructions sit and what needs to be resolved before a final design is prepared.
This is especially useful when a building has several roof planes, roof features or a surrounding environment that makes the initial assessment less straightforward.
4. Move into the detailed design workflow
Structural review, electrical design, safety clearances, permits and final module placement remain the work of the responsible professionals. A 3D roof model can provide a more useful project starting point; it does not make those decisions automatically.
The handoff into PV design or CAD tools is also project- and format-dependent. It should be tested in the intended workflow rather than assumed to be a one-click process.
Where this approach is useful in practice
A 3D roof model is most useful when the early site assessment creates repeated questions. Common examples include:
- roofs with multiple planes, pitches or orientations;
- buildings with dormers, chimneys, roof windows or technical equipment;
- sites with trees or neighbouring buildings close to the roof;
- projects where sales, design and the customer need a shared view early on;
- opportunities where an early site visit does not answer every question on its own.
The point is not to remove professional judgement from the process. It is to make the project context clearer before that judgement is needed.
A 3D roof model is not a substitute for engineering
This distinction matters in solar projects. A 3D roof model does not automatically determine:
- whether a roof is structurally suitable for a particular installation;
- which electrical configuration should be used;
- the result of a project-specific shading or yield simulation;
- applicable safety distances, permits or installation requirements;
- or whether a preliminary layout can be built without further checks.
Those decisions belong with the professionals responsible for the project. The role of the model is to give them a better documented spatial context to work from.
Start with the roof context, then plan in detail
Good solar project preparation begins before the planning software is opened. It begins with a clear understanding of the roof and the details that shape the project.
3D roof models from drone imagery give solar installers and EPCs a shared basis for early roof review, proposals and layout discussions. They do not replace technical design. They can help that design begin with fewer assumptions and a clearer view of the property.
Want to see whether a 3D roof model fits your solar workflow? Create a free 3D model with Render-a.